
SimulIDE Knowledge Base – OSCILLOSCOPE
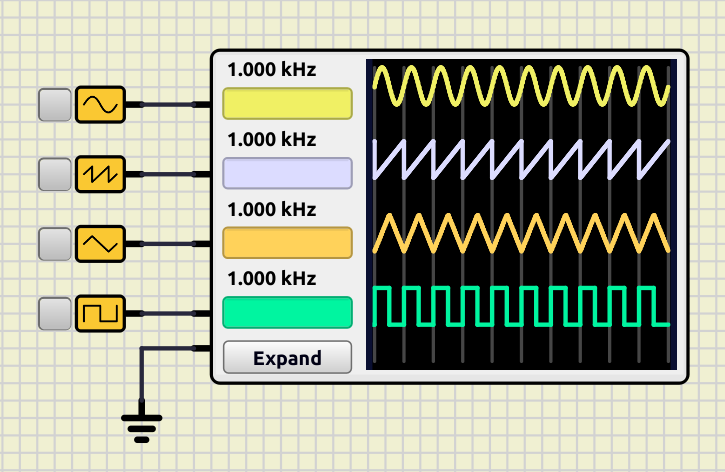
Oscilloscope has 4 channels identified with different colors and frequency indicators for each channel.
There is one input pin per channel and one for reference voltage (last one besides Expand button).
You can connect inputs to wires or enter a tunnel name in the corresponding box.
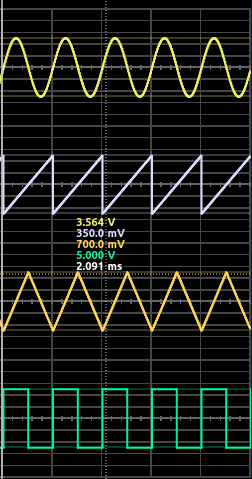
Connecting the inputs and running the simulation you will see the wave forms:
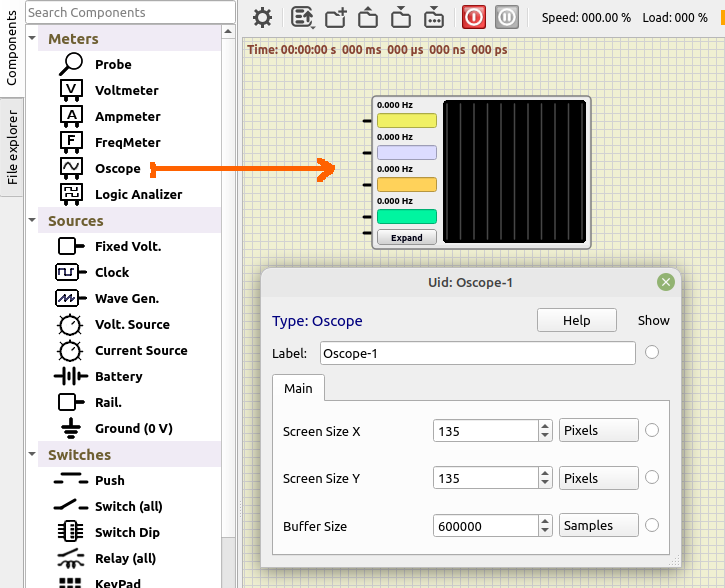
Properties:
Property: (default value)
Opening the properties (double-click) you can configure:
- Screen Size X: screen width when not expanded (default: 135).
- Screen Size Y: screen height when not expanded (default: 135).
- Buffer Size: number of samples retained in memory (default: 600000).
Expanded mode:
You can click in “Expand” button and get a window with a more detailed view and all the controls.
This floating window is resizable and you can close it like any other window:
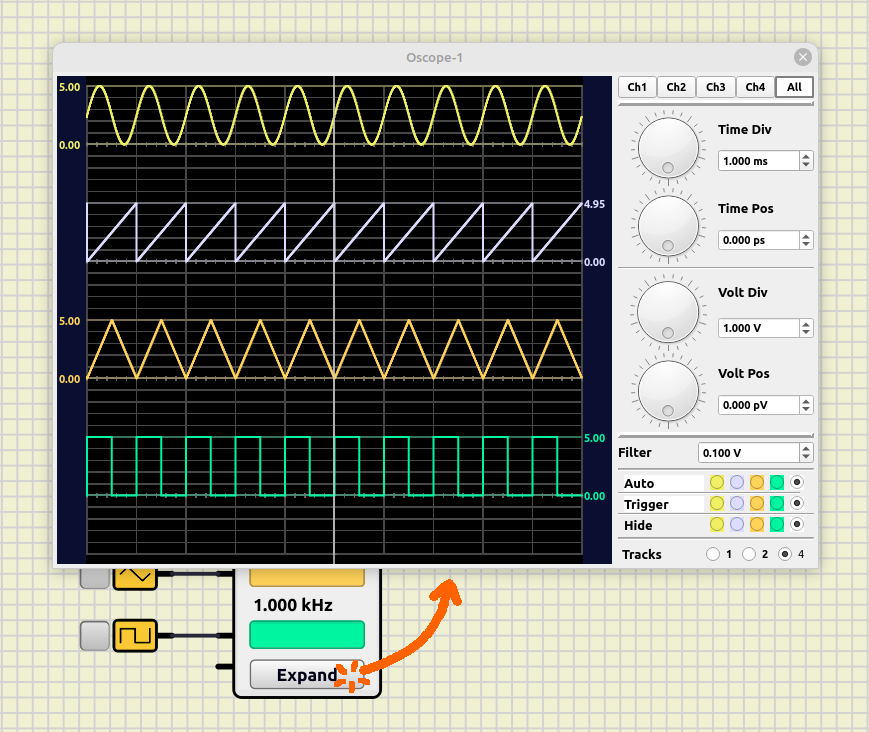
Controls:
From top to bottom, you can find the following controls:
Channel Buttons:
With this row of buttons you can select the “active” channel.
When you select a channel, value boxes will change to the channel color.
Al changes done in Time Pos, Volt Div and Volt Pos, will be applied only to selected channel.
To apply changes to all channels, click on “All” button. 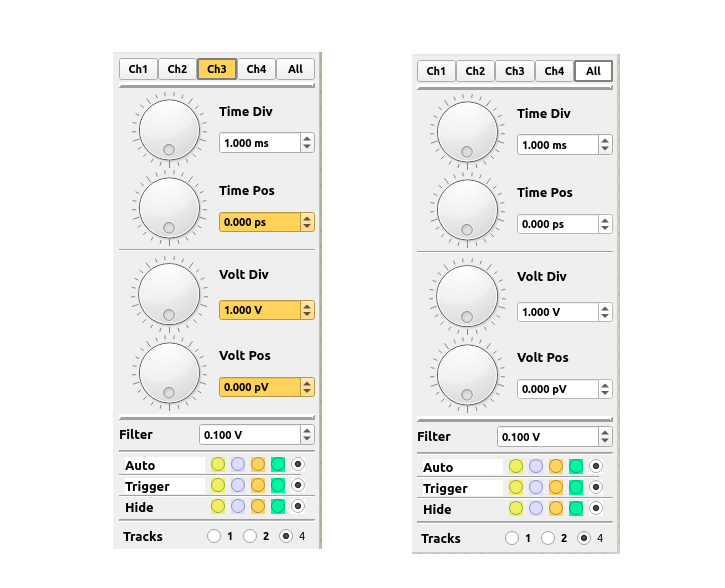
Time controls:
With these you can zoom-in or zoom-out in time (for all channels) and set the horizontal position of each channel.
- Time Div: size of one horizontal division in the screen.
- Time Pos: relative position in time for selected channel.
You can also use the mouse in Oscilloscope screen:
- Mouse wheel to zoom in/out.
- Left-Click and move to change position.
- Middle-Click reposition time reference.
- Cursor shows voltages for each channel and time value.
Voltage controls:
To configure vertical size and position for each channel.
- Volt Div: size of one vertical division in the screen.
- Volt Pos: relative vertical position for selected channel.
You can edit time and voltage values with the dial, or set a value in the corresponding box.
You can enter a multiplier after the value in value boxes, for example type: “10m” + Enter, to set 10 miliseconds or 10 miliVolts.
Other controls:
Filter: Any voltage change below this value will not trigger.
Auto: Auto-resize channel to fit in the screen.
Trigger: Channel used to trigger.
Hide: hide channel from screen.
Tracks: Divide screen in different tracks:
- 1 track: All channels will overlap in a single track.
- 2 tracks: channels 1 and 3 in top track, 2 and 4 in bottom track.
- 4 tracks: Each channel has it’s own track.
